Two weeks ago when I posted about my sewing room I had just prepped the trim for painting.

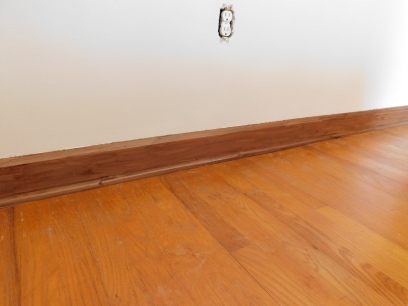
Actually, to be fair, this picture shows the painted trim. From far away it doesn’t look too bad. As I stood and stared at it, though, I didn’t like how it looked.

It was Palm Sunday and I suddenly had a bit of a quandry. I had purchased a gallon of expensive paint that was on the ‘Mis-tint’ rack at Lowe’s. It was a peachy tan color. Since it was only $9 instead of the original $30 I thought I could doctor it up with some dark chocolate paint that I had at home. I figured that would be enough to darken it up to the color that I wanted. After painting the trim I had to decide if I wanted to try messing with it some more, or if I would just bite the bullet and go buy another gallon of paint in a color that I actually wanted.

Looking at it next to the floor really bothered me. It was early afternoon and I just wanted to get this project done. Then I remembered something I had read on a blog that I follow and decided to take the technique and twist it a bit.
Jen (her blog is Epbot and is great) and her husband, John, used to be professional painters/faux finishers. Last month John posted a video on YouTube that showed you how to get the look of wood grain using just paint, glaze and stain. I had watched it during my lunch break at work without the sound, so I was going by memory of what he had done. I decided that maybe if I just threw some stain on the paint and let it sit that it might actually darken to the color that I wanted. (I’m an accountant, not a chemist so if you’re having a scientific fit right now just chill… it all comes out in the end).
Jay gave me a scrap piece of wood that I painted, and once it was dry I threw on three different colors of oil based stain and let it sit for about an hour. When I came back I wiped it off and found the color that I thought would work. However, because it’s oil based it had kind of turned gummy. I showed Jay and told him that my plan of attack was going to be to start in one corner of the room and work my way around. When I got back to where I started then I would wipe off the stain and see how the trim looked. I would play it by ear.
I grabbed my can of stain, a bunch of lint-free wiping cloths, my nitrile gloves and some canned cat food trays for the soiled cloths. I had no hope that this was really going to give me anything good, but I didn’t want to buy another gallon of paint. I would just tolerate whatever happened with the stain. I wiped it on and started to spread it around on the trim. Then I stopped. I looked in disbelief. I spread some more stain on the trim a little higher. I really liked the results I was getting and decided that I was NOT going to wipe any of this stain off. Let me show you what I was seeing…

I was getting the look of wood grain without really trying. I had finished around the doors when Jay came in and looked. He was amazed.

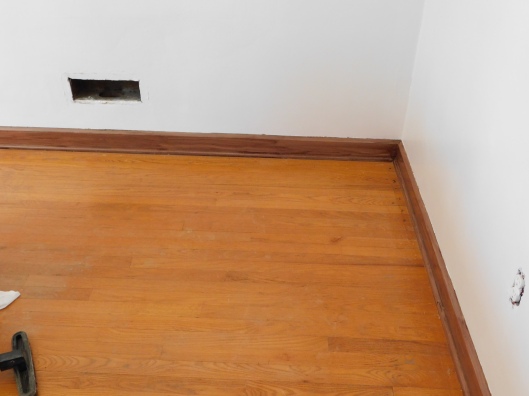
It even looks good close up.

When you walk into the room it looks like I refinished the woodwork. It’s almost a walnut-looking wood now, but I’m so glad that I cheaped out and decided to just make do with what I had in the house.

Not all of it is perfect, and looking at these pictures I see spots I wish I had touched up, but it’s okay because most of it will be hidden by furniture.
Since this was oil-based stain I wanted to give it plenty of drying time before I did anything else in the room. So while the trim was drying I worked on the next project: outlet and switch plate covers. I had looked all over for something that I liked. After all, I didn’t want to put boring outlet covers in this room. When I couldn’t find anything that I liked I decided to make my own. Yes, this is often how I get myself into trouble.

I think they turned out pretty good! Not only are they sewing themed, but that’s a picture of my actual sewing notions.

This one didn’t turn out quite so good. I tore the tissue paper while trying to modge podge it to the cover. See the pins to the left of the switch?

It’s the magnetized pin holder that Jay helped me make from a thrift store find a few years ago. I used the same picture for all of the covers in this room, but you could easily have a different one on each outlet if you wanted. I took pictures so I’ll put up a tutorial later.
Once those were installed, the trim was dry and the new duct covers were installed I just had to do a last bit of cleaning before moving things in.


I am so happy with how this room turned out!
Let’s get some furniture in there!

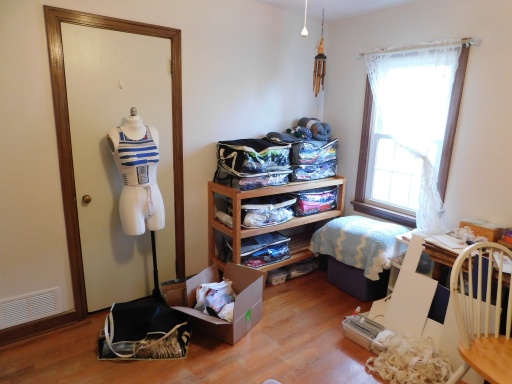
I don’t have everything in here yet. Jay still has to install my wall-mounted ribbon spool holders, the wall-mounted TV holder, and he just finished building the platform to raise my cutting table to a better height (it’s the white table that you see in the picture with the batting on it). I’m 5’10” so I would like a little more height to comfortably cut fabric.

As you can see my Inspector General showed up to make sure everything was in its proper spot.

I’m using blanket storage bags to store my fabric. I’m hoping it will keep the dust off of it and maybe protect it a little more. Since it’s right by the window I should probably cover it with something to keep the sun from fading it.
I decided not to put the blinds back up.

I purchased a fancy curtain rod and used one of my lace curtains.

During the day I have to make sure it’s tied back. Otherwise, somebody gets grumpy.

I’m not kidding, either. The other day I was getting ready for work and Bob was sitting in the hallway whining. I remembered that I hadn’t tied the curtain back yet, so I headed into the sewing room. He ran ahead of me and was on the perch before I could get the curtain pulled back. He was whining because he didn’t want to look through the curtain! He’s not spoiled!
Let’s do some before and after pictures, okay?
I spent all weekend in there and loved it! The overall footprint is smaller than what I used to have for my sewing room…

… but the head space is so much better!


Pingback: Project Linus Blanket #32 | Kerry'd Away
Pingback: Bodycon Dress 2 | Kerry'd Away