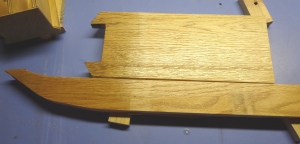
 If you read the first part of the Advent Wreath Stand build post then you know that Jay and I are using wood that came from the ‘old’ church. Knowing that not only is our supply of this wood limited, and the time in which we have to build this stand, has been slightly stressing me out. My deepest fear is that somehow I’m going to mess it up and the parishioners are going to be highly disappointed that something so precious (their old pews) went to make something so bad.
 Jay had the arms all ready for the finishing department to work on, so I had to stop stressing and just do my best. Yikes!
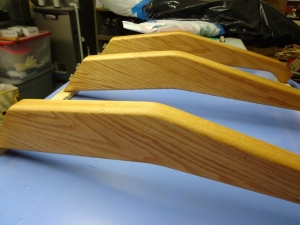
 You probably can’t tell, but the arm on the left is unsanded and the arm on the right is sanded. I spent three hours working on these arms. I started out using 100 grit sandpaper and worked my way up to 220.
 I cleaned them up and asked Jay to check them to see if there were any spots that I had missed. Nope. They felt great.
 Even though we are using oak for the stand we have two different sources of it. The base will be made from oak planks that my dad salvaged and then we have the arms and legs made out of the pews. When testing stains I made sure to test on samples of both. This really isn’t a great picture, but the closest that I could get was the Golden Oak color all the way to the left. The stand might end up with kind of a two-tone look, but I think that will be okay, too. Oak is such a beautiful wood that my goal is to bring out its beauty and highlight it. Hopefully I’ll be able to accomplish that!
 First I used a Pre-Stain on the arms. This stuff is similar to using a primer when painting; you are helping to keep the stain from going on in a blotchy manner. The pre-stain is supposed to smooth and even out the stain as it soaks into the wood. Then I used a light touch to apply a thin coat of stain to the arms. If it was too light then I could do another application to darken it.
 Don’t these look gorgeous? That stain really highlighted the grain and warmed the arms quite a bit. This is the exact look that I had in my head.
 As the arms dried I looked over to Jay’s workbench to see what he had been doing. Guys, I think that he’s a bit confused. He thought he was building an airplane! The fuselage… the vertical stab… old habits die hard.
 Actually, he was looking to see how the legs looked on the base. Here you can see that he is gluing the feet together. The feet are made out of the salvaged oak.
 Then the legs were glued onto the feet. Jay and I actually consulted on these feet for quite a while. I really wasn’t happy with how they looked at this stage. Call me silly, but all I could see was an old guy’s skinny chicken leg stuck into an orthopedic shoe. Come on! Tell me that you don’t see it!
 We determined how much to cut off of the bottom to make it a shorter ‘shoe’ and Jay came up with the idea to add the bit of relief to the bottom. I like this. It looks slightly more elegant, if you can call it that. Now instead of an orthopedic shoe we have Snidely Whiplash’s boot!
 Before routing the slats for the other end of the hardware for the arms to slip into, Jay had to glue support blocks to the inside of the base.
Before I left work I received this:
 Okay, technically this is the picture that I took when I got home so it’s not the actual picture that I received. But doesn’t that look great?! Don’t worry, Jay promises that when he’s all done the clamps will not be part of the stand.
For comparison’s sake let’s take a look at the original design:
 Isn’t it amazing how Jay is able to draw something up in the CAD program and bring it to life??
 This is going to be amazing once it’s all finished and assembled. After this picture was taken he glued the base pieces together. I should have the arms completely finished by the time that I have to start working on this. We are going to cut the top of the base at an angle so that when you look at it straight-on your eye should be swept up towards the back. One other project that I have to do is make a protective sleeve for the arms to be stored in when not being used. I think it would be easier to keep the whole thing together if they are placed in a sleeve, and the padded sleeve will help to protect them from damage. I plan on using the same material that I’ve been using when I make wing bags.
So, that’s the progress so far. Hopefully the rest of it will go just as smoothly!

Pingback: Advent Wreath Stand – Part 3 | Kerry'd Away