Jay has finally found a moment to download some more pictures for me. Let’s see what we’ve got!
 This is how we left the A4 in the last post. Things were being fitted and prepped for the next step.
I’m so excited! What could be next?
 It seems that we have to keep the lungs together by using black dental floss. I’ve heard of cinnamon dental floss, but apparently the best tool for this job is black licorice-flavored dental floss. This will help to keep the lungs from flying apart when the jet is wheezing after a good flight.
 Now that the dental floss is wrapped around the lungs we can mount the pretty carbon fiber fan. Make sure that you actually screw the fan into place so that it doesn’t become dislodged during your first flight!
 Once everything is assembled inside you can put the back hatch on, figure out how to affix it properly, and then do some filling to smooth out the skin. There’s nothing worse than people pointing and laughing at your back crack…
 Ewww! Why would Jay take a picture of the loogie that he hocked onto the jet? Man… I just don’t understand guys…
 Now it’s back to the rudder. You need to line up the holes for the hinges. You don’t want your tail to be askew!
 Ta-Da!! A hinged rudder! It’s really strange, though, that the rudder looks like a hair comb. Maybe the A4 is more fashion-forward than I thought! It carries a comb in its back pocket.
 Now it’s time to fiberglass! This is Jay’s favorite part. He LOVES the process of glassing, filling, sanding, and filling some more. There’s nothing like red dust in the morning…
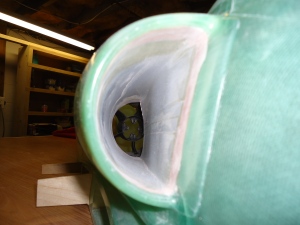
 Oh no! We almost forgot to check the ears for ear wax buildup.
Phew! All clear…
 Now that the filler is dry we lay the pieces somewhere to collect a whole bunch of dust.
Wait…
I think that this was primed. And then Jay wet sanded it all off. I’m not sure. All I know is that there was a bunch of water on the bench and he kept sanding off the stuff that he had just put on. Maybe to prolong the building experience? Maybe he wants it to have a weathered whale-skin look? Hmmm….
 Once you have finished playing in the water and paint you get to move onto the kayaks. I believe that these go on the fins… I mean wings, as decoration. At least on this model they do. They don’t serve a functional purpose except to add a few more words to my blog post.
These get glued on right where Jay added the flaps to the wings. Because this wasn’t part of the instructions that came with the jet he had to modify the kayak so that it would allow the flap to move freely. You can see where he notched it out and is gluing the notched part to the flap.
 You will want to do this on the bottom of both wings. Don’t forget to also cut out the part of the kayak where the landing gear will live.
 Yeah! Matching wings with their kayaks firmly affixed.
Not bad! Considering we’ve added the fan, the fiberglass, the epoxy, the filler, the primer, removed the primer, and the kayaks we’re still looking good.
In our next post we will take a look at the process of gluing things in place. Different things. Not the things that we’ve already glued together.
See you then!

